 Most wall thickness problems start with good intentions. You're trying to keep a part light, fit it into a tight assembly, or build in a little extra strength. In CAD, that usually just means sliding a dimension one way or the other—thinner for weight, thicker for safety. But on the shop floor, those same moves can push a wall outside the range that machines cleanly, even when everything still looks reasonable in CAD.
Go too thin and walls start to behave more like springs than solid geometry, flexing and vibrating under cutting forces. The result is slower machining and harder-to-hold tolerances. Go too thick, and you pay for it in cycle time: more material to remove, more passes, and longer programs for features that may not see much load in service. The sweet spot is somewhere in between—walls that are thin enough to meet design and weight targets, but thick enough to machine efficiently and hold their shape.
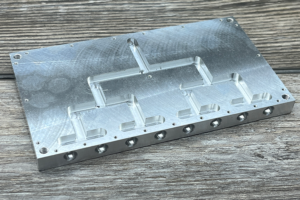
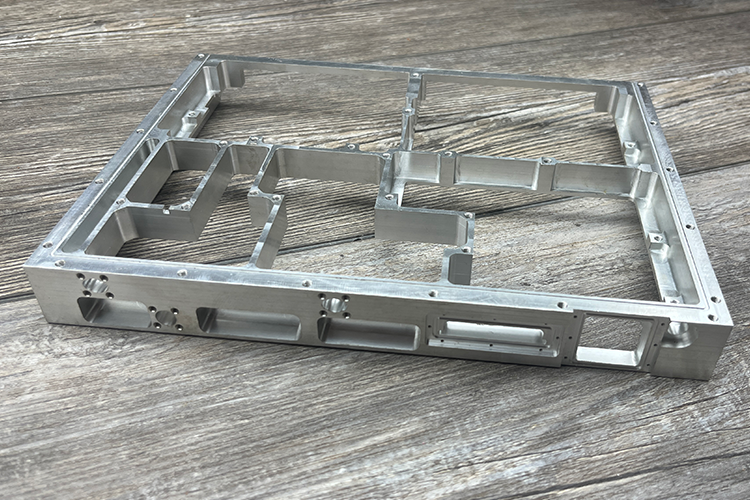
At Approved Machining, we spend a lot of time helping customers find that middle ground. Here's a closer look at how we evaluate CNC machining wall thickness by material, geometry, and end use, and which adjustments actually improve cost and manufacturability.
Table of Contents
- 1 What Happens When Walls Are Too Thin—or Too Thick
- 2 How Machinists Evaluate Wall Thickness on a New Design
- 3 Wall Thickness Guidelines by Material
- 4 The Cost Reality of Thin Walls
- 5 Design Strategies When Thin Walls Are Necessary
- 6 End-Use Conditions: Can Your Walls Survive the Real World?
- 7 Designing Walls That Machine Cleanly
What Happens When Walls Are Too Thin—or Too Thick
Once you move from the CAD model to the machine, wall thickness stops being a design preference and starts affecting stability and efficiency in very practical ways.
When walls are too thin, they don't stay still under cutting forces. As the tool engages, a thin section bends away and springs back, so the cutter never meets a consistent surface. Instead of a clean, continuous cut, you get a pattern of digging, rubbing, and vibration. That shows up as chatter, waviness in the surface, or dimensions that shift as the wall moves.
Geometry can make this worse:
- Tall thin walls behave like fins.
- Thin features at the bottom of deep pockets bring long-reach tools into play, which introduces tool deflection on top of wall deflection.
- Plastics add yet another layer, since heat buildup softens the material and exaggerates every movement.
Even parts that survive machining can cause trouble downstream. Thin walls may drift out of tolerance as finishing passes release internal stress, and they're more prone to warping or cracking during deburring and handling. Sometimes everything looks fine until the final operations, and then the wall gives way, and an almost-finished part becomes scrap.
When walls are thicker than necessary, failure isn't really the concern, but cost is. All that extra material has to come off, which means longer roughing passes, more heat to manage, and more finishing time to bring features down to final size. For prototype work, especially, conservative wall thickness can stretch a job well beyond what the part actually requires. You'll get something solid and predictable, but you've traded unnecessary material for unnecessary cycle time.
How Machinists Evaluate Wall Thickness on a New Design
When a new CAD model comes in, wall thickness is one of the first things we look at. Here’s what we’re checking for:
Material
Materials react to cutting forces in very different ways, and what works in one may not work in another.
- Aluminum is forgiving. It’s stiff relative to its weight, dissipates heat well, and generally machines cleanly even with moderately thin walls.
- Stainless and steel are strong, but the higher cutting forces make thin sections more prone to chatter and heat buildup.
- Plastics are the trickiest. These materials are flexible and heat-sensitive, so thin walls tend to deflect, melt, or produce a poor surface finish.
For instance, a wall thickness that’s perfectly fine in 6061 aluminum might be completely unworkable in acetal or ABS.
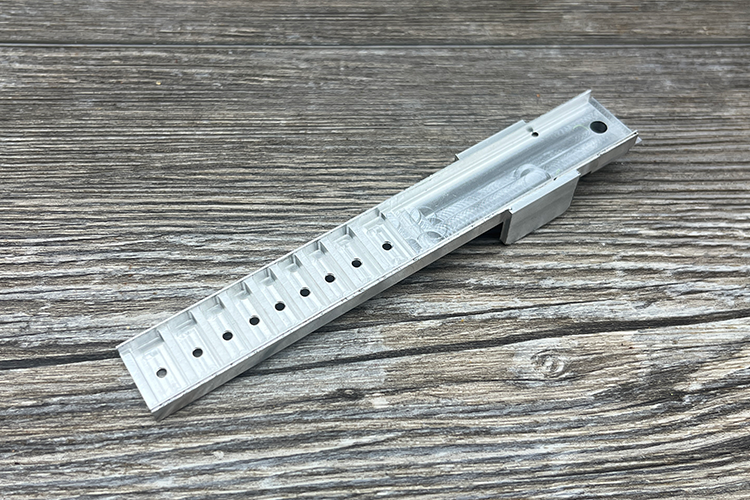
Height relative to thickness
A thin wall that’s short can be stable, but a thin wall that’s tall starts acting like a fin:
- 0.040" thick × 0.100" tall: usually manageable
- 0.040" thick × 1.000" tall: flexible enough to vibrate and warp
Once walls are an order of magnitude taller than they are thick, they become high risk without ribs or a thickness increase.
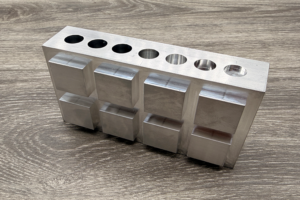
Tool access and depth
A thin wall on an open, accessible face is easier to machine than one buried at the bottom of a deep pocket. Deep pockets require long-reach tools, and longer tools deflect more. When tool deflection combines with wall deflection, instability compounds quickly, making it much harder to hold tolerances and surface finish.
Tolerances near thin features
A thin wall might be manufacturable on its own, but pair it with a tight tolerance, and the picture shifts. A ±0.001" callout near a flexible feature is one of the fastest ways to drive up cost and risk because it forces slower feeds, lighter passes, and more inspection. Where function allows, relaxing tolerances near thin regions gives the machinist more room to work.
Functional role
Finally, we consider what the wall is actually doing. Is it structural? Load-bearing? Cosmetic? Just a divider?
If the feature doesn't need to carry much load or hold a critical dimension, even small adjustments, such as adding thickness, a supporting rib, or reducing the wall height, can make the part dramatically easier and cheaper to produce.
Wall Thickness Guidelines by Material
Even with good ratios and accessible geometry, material choice often determines how thin you can go before walls start to behave unpredictably. Some materials stay stable with thin walls. Others fight you the moment the cutter makes contact.
Most thin-wall problems come from this mismatch: a design that might work perfectly in aluminum becomes high-risk when it’s quoted in a tougher metal or a flexible plastic. Geometry matters, but the material often decides where the practical limits really are.
Starting Points We Use at Approved Machining
Here are the wall-thickness ranges we typically recommend for CNC machining. These aren’t hard limits, but they’re reliable starting points if you don’t want wall thickness to be the reason a part goes sideways.
| Material | Safe Minimum | High-Risk Zone | Notes |
|---|---|---|---|
| Aluminum (6061/7075) | 0.080"–0.100" | Below 0.040" | Good stiffness and heat dissipation. Can go thinner with short walls and relaxed tolerances. |
| Stainless / Steel | 0.060"–0.080" | Below 0.060" | Strong, but higher cutting forces cause chatter on thin features. |
| Titanium | 0.080"+ | Below 0.060" | Strong material, but poor heat conductivity leads to chatter and deflection. Avoid very thin unsupported walls. |
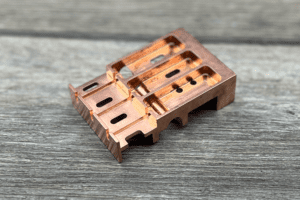
| Brass / Copper | ~0.060" | Below 0.040" | Machines cleanly and stays stable, but soft edges can deform. |
| Plastics (ABS, Acetal, Nylon) | 0.100"–0.125" | Below 0.080" | Flexible and heat-sensitive. Prone to melting, warping, and poor finish at thin sections. |
| Acrylic / Polycarbonate | 0.125"+ | Below 0.100" | Brittle. Thin, clear walls chip or crack easily. |
These ranges cover the majority of prototype work. Still, there are cases where we’ll go outside them—usually when the walls are short, tolerances are relaxed, or reinforcing features help tie thin sections back into more rigid geometry.
Of course, wall thickness doesn't just determine whether a part machines cleanly. It also affects what it costs.
The Cost Reality of Thin Walls
There's a reasonable assumption that thinner walls should cost less. After all, less material means less cutting, which should mean a lower price, right? But in practice, the opposite is usually true.
Thin walls take longer to machine. Because they flex under cutting forces, machinists have to compensate with lighter cuts, slower feed rates, and additional finishing passes. This added complexity means that a part that could be roughed aggressively with 0.100" walls might need three or four careful passes at 0.040". Smaller or specialized tools sometimes come into play as well, and all of that adds cycle time—which is ultimately what drives cost.
Thin walls also carry a higher scrap risk. It doesn't take much—a small amount of tool deflection, a bit of heat buildup, or stress releasing unevenly—for a thin feature to end up out of tolerance. If a wall warps after finishing or cracks during handling, the part is scrapped after most of the machining time is already invested. That can be an expensive loss.
It may sound counterintuitive, but a part designed to be "light" often gets cheaper, more accurate, and cleaner-looking when you add a little thickness back in. Thicker walls allow more aggressive roughing, faster finishing, and better dimensional stability throughout the process.
From a quoting standpoint, when we see very thin walls, we have to build that extra risk and cycle time into the price—even if the overall part is small. The material savings from going thin are almost always offset by longer machining and higher scrap exposure.
Design Strategies When Thin Walls Are Necessary
Of course, not every part has the luxury of thicker walls. Sometimes, weight targets are firm, the part has to nest inside an assembly that's already locked in, or you're working with constraints that simply aren't negotiable. When that's the situation, you're not trying to avoid thin walls—you're trying to make them work.
There are a few reliable ways to get there.
#1: Add structural reinforcements
A flat, unsupported thin wall will flex under cutting forces and continue flexing under real-world loads. But tie that wall into the surrounding geometry with a rib, gusset, or fillet, and the stiffness changes dramatically.
- Ribs run perpendicular to the wall and act as braces, reducing how much the wall can bend.
- Gussets do similar work at corners and transitions.
- Fillets and radii distribute stress more evenly and provide a smoother path for the tool, which helps with both machining stability and long-term durability.
- Curved surfaces are inherently stiffer than flat panels at the same thickness, so even a gentle curve can improve rigidity.
You don't always need a major redesign. Even a small rib or radius can turn a high-risk feature into something that a machinist can cut cleanly.
#2: Make small geometry adjustments
Sometimes the fix is simpler than adding features. Going from 0.040" to 0.080" doesn't sound like much, but it can be the difference between a wall that chatters and one that machines cleanly. Reducing wall height, breaking a tall section into shorter segments, or moving a thin feature out of a deep pocket and onto a more accessible face are additional small adjustments that often cut machining time and risk without changing how the part actually functions.
#3: Consider alternative processes
CNC machining isn't always the best fit for very thin walls. If thin-wall geometry is truly non-negotiable, it's worth asking whether a different process makes more sense.
- 3D printing can produce thin walls that would be impossible to machine, since there are no cutting forces involved.
- Sheet metal works well for enclosures and shells. You can achieve very thin walls in sheet metal because the material isn't being cut from a solid block with a tool pressing against it.
CNC is the right call for most parts, but not every part. Sometimes the geometry simply fits a different process better.
#4: Consult early
Most wall-thickness issues are easy to fix if they're caught early. A quick DFM conversation before the design is finalized can flag problems while changes are still simple to make. Once the model is locked and quoted, adjustments get harder and more expensive.
 End-Use Conditions: Can Your Walls Survive the Real World?
So far, we've been talking about wall thickness in terms of machinability. But the part also has to survive once it leaves the shop. A wall that machines fine and passes inspection can still fail in service if the operating environment is harsh enough.
A few conditions that often demand thicker walls than you'd otherwise need:
- High temperature. Aluminum loses stiffness as it heats up, and plastics can soften or creep under sustained thermal load. Walls that felt solid at room temperature may not hold up as well at 150°F.
- Vibration. Parts mounted near motors, pumps, or engines see constant cyclic loading. Thin walls flex with each cycle, and over time, that repeated movement leads to fatigue cracking. A wall that looks fine on the bench can fail after a few months bolted to a vibrating housing.
- Pressure. Internal or external pressure pushes on walls from one direction. Thin sections can buckle or rupture under loads that thicker geometry would handle easily. Housings for pressure or vacuum applications need more material than cosmetic covers.
- Chemical exposure. Some plastics swell or crack when exposed to certain chemicals. Some aluminum alloys corrode in aggressive environments, while stainless steel can pit in chloride-heavy conditions. When walls are already thin, even minor degradation can lead to failure.
If your prototype is going to see anything close to real-world conditions during testing, it's worth building in a little extra thickness as insurance. You can always optimize later once the loads and environment are validated. But a part that fails early testing because the walls were too aggressive doesn't tell you much—except that you need to make it again.
Designing Walls That Machine Cleanly
Getting wall thickness right is about understanding the limits of your material, geometry, and end-use conditions. Once you know that, the adjustments are usually small—add a rib here, relax a tolerance there, or bump a wall from 0.040" to 0.060" in a spot that won't affect fit or function.
That's the kind of conversation we have with customers at Approved Machining. If you've got a part with thin walls, tight envelopes, or aggressive weight targets, send it our way. We'll flag anything that looks risky and help you find the best path forward.