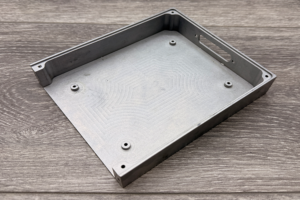
At Approved Machining, anodizing is one of the most common finishing choices for aluminum parts because of its variety of benefits. The process forms a protective oxide layer that enhances corrosion resistance, improves durability, and can create a clean, professional appearance in many different colors.
But not all anodizing is the same. For precision machined aluminum parts, two anodizing processes are especially important to understand: Type I and Type II. Each offers distinct advantages depending on your part’s function and your finishing goals.
In this post, we’ll break down the differences that determine which choice is the best for your parts. We’ll also outline several design for manufacturability (DFM) best practices that will help you get the best results from your finishing process.
Table of Contents
Essential Differences Between Type I and Type II Aluminum Anodizing
 Deciding between Type I and Type II aluminum anodizing largely comes down to your part’s application and the precision you require.
Type I, which uses chromic acid, creates an extremely thin oxide layer that’s most suitable for precision parts where tight tolerances are required. Type II anodizing, which uses sulfuric acid, builds a thicker, more durable coating that’s well-suited for wear resistance and color anodizing—but your parts must be able to accommodate larger dimensional changes.
In the table below, we’ve outlined some of the key differences between Type I and Type II aluminum anodizing.
| Type I: Chromic Acid | Type II: Sulfuric Acid | |
| Coating Thickness | Extremely thin (0.00002" – 0.0001") | Thicker (0.0002" – 0.001") and more durable than Type I |
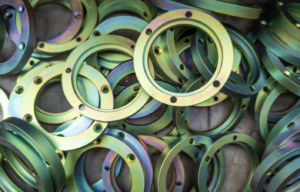
| Appearance | Matte gray finish; not suitable for dyeing | Can be dyed in various colors for branding or identification |
| Corrosion Resistance | Excellent corrosion resistance | Excellent corrosion resistance |
| Wear Resistance | Less wear-resistant than Type II due to its thin layer | Best for moderate-wear applications where a balance of corrosion resistance and surface protection is needed |
| Suitability for Precision Parts | Preferred for tight-tolerance parts where dimensional changes are critical | Not suitable for precision parts with tight tolerances due to its thickness |
| Electrical Insulation | Maintains some conductivity due to its thin layer, but still provides insulation | More effective as an electrical insulator due to its thicker oxide layer |
| Cost | More specialized and typically more expensive due to its use in aerospace and precision applications | More cost-effective, making it the standard for many industries |
DFM Best Practices for Anodized Parts
For the best performance and finish, it’s important to design aluminum parts with anodizing in mind. Follow these DFM best practices to achieve high-quality results:
Account for Coat Thickness in Your Tolerances
Both Type I and Type II anodizing add thickness to a part’s surfaces and can potentially bring it out of spec. This is particularly important when designing mating components, threaded features, or precision bores.
Type I anodizing is often the best solution in these instances, as its minimal thickness makes it ideal for tight-tolerance parts. However, if Type II anodizing is otherwise more suitable for your priorities, you’ll need to account for the additional thickness of the oxide layer in your designs.
✅ Design Tip: Specify pre-anodized and post-anodized dimensions in your drawing to ensure that final tolerances will be accurate.
Adjust Internal Threads for Anodizing Buildup
The anodized layer can accumulate on thread surfaces, reducing clearances and potentially leading to issues during assembly. To account for this when designing your parts, it’s wise to slightly oversize internal threads and note any critical threads that must be left as bare metal.
✅ Design Tip: For precision applications, consider post-anodizing thread chasing to remove excess oxide buildup or use helicoils as an alternative.
Note Critical Features That Require Masking and Selective Anodizing
Features like electrical contact points or bearing surfaces often need to remain uncoated in order to retain functionality. We use tape or liquid masking for local coverage during the finishing process and plug any bores, tapped holes, or tight-tolerance areas.
✅ Design Tip: Clearly mark any masked areas on your drawings to avoid unintended coating and ensure proper functionality of your parts.
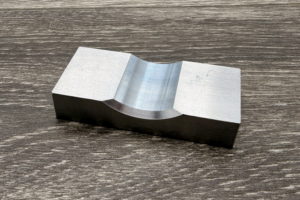
Avoid Sharp Edges When Possible
Sharp edges do not anodize well and may experience inconsistent coating buildup. If these features are necessary, a Type I anodized finish is likely best. Its thinner oxide layer will minimize excess buildup while leaving your parts with a natural but slightly dulled finish.
✅ Design Tip: Whenever possible, add chamfers or radii to your part designs to remove sharp edges.
Select Anodization-Friendly Aluminum Alloys
Not all materials anodize equally well. Alloys, such as 6061, 5052, or 7075 offer the best cosmetic and performance results. Conversely, it’s important to avoid aluminum alloys with a high copper content, such as aluminum 2024, as anodizing will result in a dull or uneven finish.
✅ Design Tip: Select an anodization-friendly alloy if a high-quality cosmetic finish and corrosion resistance are priorities.
End-to-End Solutions for Your Machining and Finishing Needs
Neither Type I nor Type II aluminum anodizing is “better” than the other. Instead, the right choice depends on your priorities. If tight tolerances and minimal dimensional changes are critical, Type I is often the best choice. If aesthetics, color options, and wear resistance matter more, Type II may be the better fit.
Navigating the anodizing process becomes much easier when you work with the right manufacturing partner. At Approved Machining, we have extensive experience in all facets of precision machining, from design and manufacturing to finishing and assembly. Whether you need CNC machining services for prototypes or low-volume production, we’re ready to help.
Reach out and request a quote, and let’s discuss how we can support your next project.